Monday, November 19, 2012

Ajax Jquery Autocomplete Servlet


In this tutorial you will learn how an autocomplete function can be embedded in a servlet based application using ajax, jquery.
To use the autocomplete functionality in my example I use the plugin of jquery, you can also download these plugin from the link I am giving below :
http://bassistance.de/jquery-plugins/jquery-plugin-autocomplete/
Now create a html page into which I uses the plugins of jquery and the function ready() that calls the function to invoke. In the body of this function uses the following function $("#text1").autocomplete("AutoCompleteServlet");  here text1 is the textbox id, and AutoCompleteServlet is a servlet class and there is also a textbox which will take the value that the user will give. When in this textbox a character is given the related suggestion value will be displayed in dropdown list these values are coming from the servlet and the suggestion values are showed in dropdown list using the jquery functions.
Then created a servlet class into which I do the hard code of names as a String variable which will displayed as suggestion in the dropdown list. And the other codes for managing these data values such as create a function that will change the case of letters given into the textbox, then created an ArrayList ( ) using which we will find the string values after changing into lower case and add only those values in the ArrayList which are equals after comparing the characters given into the textbox by the user.
In the service method of this example getParameter() method is used for tracking the values and Iterator is used for traversing the values.
Example :
autocomplete.html
<!DOCTYPE html PUBLIC "-//W3C//DTD HTML 4.01 Transitional//EN" 
"http://www.w3.org/TR/html4/loose.dtd">
<html>
<head>
<link rel="stylesheet" type="text/css" href="css/jquery.autocomplete.css" />
<script src="js/jquery.js"></script>
<script src="js/jquery.autocomplete.js"></script>
<script>
$(document).ready(function() {
$("#text1").autocomplete("AutoCompleteServlet");
});
</script> <style>
input {
font-size: 120%;
}
</style>
</head>
<body>
<h3>Enter text :</h3>
<input type="text" id="text1" name="n"/>

</body>
</html>
AutoCompleteServlet.java
import java.util.ArrayList;
import java.util.Iterator;
import java.util.List;
import java.util.StringTokenizer;
import java.io.IOException;
import java.io.PrintWriter;
import javax.servlet.ServletConfig;
import javax.servlet.ServletException;
import javax.servlet.http.HttpServlet;
import javax.servlet.http.HttpServletRequest;
import javax.servlet.http.HttpServletResponse;
public class AutoCompleteServlet extends HttpServlet
{
private int count;
private List<String> name;
private String data = "Aman, Albela, Ali, Ankit, Azam, Aryan,"+
"Bhumi, Bharat, Bhaskar, Bigul, Chaman, Chaturvedi, Chatrapati," +
"Chitra, Deno, Digboi, Deepak, Doremon, Elepahant, Eagle, Erose," +
"Funny, Fun, Fruit, Galgotia, Ghosle, Gautam, Grish, Honda, Hari," +
"Harsh, Irfan, India, Indu, John, Johny, Jyotsna, Karunya, Kirti," +
"Koshla, Lion, Laugh, Leg, Lotus, Mohan, Marshal, Maurisus, Monaco," +
"Neil, Nelson, Nurul, Omang, Oman, Ozone, Orient, Pawan, Puri, Pushkar," +
"Quraishi, Qutar, Quarter, Ravindra, Rajesh," +
"Rohit, Roshan, Sunil, Surat, Sah, Saurya, Trilok, Tiwari, Top, Torch" +
"UK, USA, Uzbekistan, Vasant, Varun, Vipul, Vaidya, Wasim, Waquar," +
"Xenon, X-Mas, Yemen, Yen, Yokohama, Zero, Zambia,Zimbabwe";
public void init(ServletConfig config)
{
name = new ArrayList<String>();
StringTokenizer st = new StringTokenizer(data, ",");
while(st.hasMoreTokens()) {
name.add(st.nextToken().trim());
}
count = name.size();
}
public void doGet(HttpServletRequest request, HttpServletResponse response)
throws IOException, ServletException
{

response.setContentType("text/html");
PrintWriter out= response.getWriter();
String nm= request.getParameter("q");
List<String> name = getData(nm);
Iterator<String> itr = name.iterator();
while(itr.hasNext()) {
String country = (String)itr.next();
out.println(country);
}
}
public List<String> getData(String nm) {
String country = null;
nm = nm.toLowerCase();
List<String> equal = new ArrayList<String>();
for(int i=0; i<count; i++) {
country = name.get(i).toLowerCase();
if(country.startsWith(nm)) {
equal.add(name.get(i));
}
}
return equal;
}
}
web.xml
<?xml version="1.0" encoding="UTF-8"?>
<web-app id="WebApp_ID" version="2.4" xmlns="http://java.sun.com/xml/ns/j2ee" xmlns:xsi="http://www.w3.org/2001/XMLSchema-instance" xsi:schemaLocation="http://java.sun.com/xml/ns/j2ee http://java.sun.com/xml/ns/j2ee/web-app_2_4.xsd">
<display-name>ajaxWithServlet</display-name>
<servlet>
<servlet-name>AutoCompleteServlet</servlet-name>
<servlet-class>AutoCompleteServlet</servlet-class>
</servlet>
<servlet-mapping>
<servlet-name>AutoCompleteServlet</servlet-name>
<url-pattern>/AutoCompleteServlet</url-pattern>
</servlet-mapping>
</web-app>
css and script files can be downloaded from download source link.
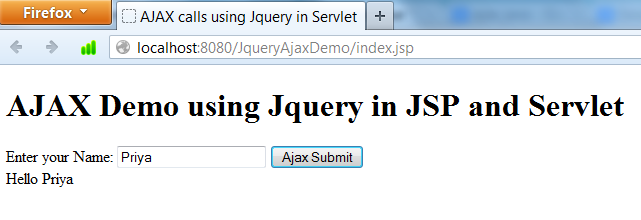
Output :
When you will execute the above example and enter the character as given into the image given below you will get the output as :

                              DownLoad Code

AJAX with JSP and Servlet using Jquery Example


AJAX - Asynchronous Javascript and XML, is a technology that enables web applications to behave more like desktop applications by making asynchronous calls to the server. This eliminates the process of doing a complete page refresh while we need only a small part of the page to be updated. Google's Auto Suggest is a best example for AJAX implementation. As we type our search terms in the search box, Google gives us suggestions according to the search terms we type without refreshing the page. 

AJAX is implemented using Javascript and XML. XMLHttpRequest is the object that does the job behind the scene. You can also use JSON ( Javascript Object Notation) instead of XML. In this post, I am going to demonstrate with a simple example on how to make AJAX calls from a JSP page to a Servlet using JQuery and update the same JSP page back with the response from the Servlet. In other words, this post will give you an overview on how to implement AJAX calls in Java web applications. I am using JQuery library instead of implementing this in Javascript because it is quite tedious to make it work across all browsers in Javascript and JQuery simplifies this in a single function. Here are the steps to reproduce to create a simple AJAX enabled Java Web Application using Eclipse and Tomcat 7,

1. Create a Dynamic Web Project in Eclipse. I have named it as "JQueryAjaxDemo"
2. Now right click on the Webcontent folder in the Project Explorer and create a JSP file. I have named it as "index.jsp".
3. In the index.jsp page, let us have a text box where the user will be prompted to enter his/her name and a button to display a welcome message with the name given by the user in the textbox on clicking it. Copy paste the below code in index.jsp file.

<%@ page language="java" contentType="text/html; charset=UTF-8"
    pageEncoding="ISO-8859-1"%>
<!DOCTYPE html PUBLIC "-//W3C//DTD HTML 4.01 Transitional//EN" "http://www.w3.org/TR/html4/loose.dtd">
<html>
<head>
<meta http-equiv="Content-Type" content="text/html; charset=ISO-8859-1">
<title>AJAX calls using Jquery in Servlet</title>
        <script src="http://code.jquery.com/jquerylatest.min.js">   
        </script>
        <script>
            $(document).ready(function() {                        
                $('#submit').click(function(event) {  
                    var username=$('#user').val();
                 $.get('ActionServlet',{user:username},function(responseText) { 
                        $('#welcometext').text(responseText);         
                    });
                });
            });
        </script>
</head>
<body>
<form id="form1">
<h1>AJAX Demo using Jquery in JSP and Servlet</h1>
Enter your Name:
<input type="text" id="user"/>
<input type="button" id="submit" value="Ajax Submit"/>
<br/>
<div id="welcometext">
</div>
</form>
</body>
</html>

3. Right click on Source directory and create a new Package. Name it as "ajaxdemo".
4. Right click on Source directory and Add -> New -> Servlet and name it as "ActionServlet". In this servlet we get the name entered by the user in the jsp page and create a welcome message that includes this name. This is then returned back to the jsp page to be displayed to the user. If no name is typed by the user in the textbox, then it is defaulted to a value called "User". Copy and paste the below code in 'ActionServlet.java' file.

package ajaxdemo;

import java.io.IOException;

import javax.servlet.ServletException;

import javax.servlet.http.HttpServlet;

import javax.servlet.http.HttpServletRequest;
import javax.servlet.http.HttpServletResponse;

/**

 * Servlet implementation class ActionServlet
 */

public class ActionServlet extends HttpServlet {

 private static final long serialVersionUID = 1L;


    public ActionServlet() {
        // TODO Auto-generated constructor stub
    }


 protected void doGet(HttpServletRequest request, HttpServletResponse response) throws ServletException, IOException {

  String name=null;
  name = "Hello "+request.getParameter("user");
  if(request.getParameter("user").toString().equals("")){
  name="Hello User";
  }
  response.setContentType("text/plain");  
  response.setCharacterEncoding("UTF-8"); 
  response.getWriter().write(name); 
 }


 protected void doPost(HttpServletRequest request, HttpServletResponse response) throws ServletException, IOException {
  // TODO Auto-generated method stub
 
 }

}


Note: If you choose to use a different name for package and servlet, provide the same name for url mapping in the deployment descriptor explained in the next step.

5. Now map the above servlet to an url pattern so that the servlet will be called whenever it matches the specified url pattern. Open web.xml file that is under WEB-INF folder and paste the below code above </web-app> tag.

<servlet>
    <servlet-name>ActionServlet</servlet-name>
    <servlet-class>ajaxdemo.ActionServlet</servlet-class>
</servlet>
<servlet-mapping>
    <servlet-name>ActionServlet</servlet-name>
    <url-pattern>/ActionServlet/*</url-pattern>
</servlet-mapping>


6. Last step is to run this project. Right Click on index.jsp and select Run on Server. Use your default web browser and avoid using internal web browser that is in-built in Eclipse. Now on the web page the user will be prompted to enter a name and on clicking the "Ajax Submit" button, the user will now see a welcome message saying "Hello (UserName)". This is all done asynchronously and you will not see a page refresh whenever the user clicks on the "Ajax Submit" button.


Code Explanation
The JQuery code written on the head section of the jsp page is responsible for the AJAX call made to the servlet and displaying the response back in the JSP page.

<script src="http://code.jquery.com/jquerylatest.min.js">   
</script>
<script>
            $(document).ready(function() {                       
                $('#submit').click(function(event) {  
                    var username=$('#user').val();
                 $.get('ActionServlet',{user:username},function(responseText) { 
                        $('#welcometext').text(responseText);         
                    });
                });
            });
</script>

When the user clicks on "Ajax Submit" button, button click event is fired and the 'get' function executes the Ajax GET request on the Servlet(ActionServlet in the above example). The second argument of the get function is a key-value pair that passes the input value from JSP page to Servlet. The third argument is a function that defines what is to be done with the response that is got back from the servlet. For better understanding download the source code of the above example from the below link and run it yourself with small alterations in the Servlet and JSP page.


If you want to add more dynamics and return other Java objects such as list, map, etc. as response instead of plain text then you can use JSON. I am aiming to provide a simple example for this in my upcoming post.

Please leave your comments and queries about this post in the comment sections in order for me to improve my writing skills and to showcase more useful posts.

Friday, November 16, 2012

Pagination in EXT-JS and JAVA


Pagination can be done in ExtJs using Java, either using struts/jsp/springmvc or any j2ee based integration
Java
/*Intialize the request params with query from the client side (ExtJs grid)*/
                JSONObject jObject = new JSONObject(); 
  HttpSession session = request.getSession(true);
  Connection conn = null;
  PreparedStatement pStmt = null;
  ResultSet rs = null; 
  HashMap<string, object=""> responseMap = new HashMap<string,object>(); 
  Integer start = Integer.parseInt(request.getParameter("start"));
  Integer limit = Integer.parseInt(request.getParameter("limit"));
  String prepareColumn = request.getParameter("prepareColumns");
                String SQLQuery =(String) session.getAttribute("REP_PAGE_QUERY");
/*Query retrival part from the Database Part */
StringBuffer paginatedresult = new StringBuffer();
   paginatedresult.append("select * from ( select x.* ,systimestamp "+"ESC_rotime"+" , rownum "+"ESC_actual_rid"+"  from ( ");
   paginatedresult.append(SQLQuery);
   paginatedresult.append(") x where rownum < ")
   .append(endRowNum).append(" ) where  "+" ESC_actual_rid")
   .append(" >= ").append(startRowNum);
   conn = ConnectionManager.getConnection();
      int totalCount = getTotalCount(SQLQuery,conn);
  
   List<!--?--> results = null;
   pStmt = conn.prepareStatement(paginatedresult.toString());
   rs = pStmt.executeQuery();
   RowSetDynaClass rowSetDynaClass = new RowSetDynaClass(rs,false);
   results = rowSetDynaClass.getRows();
/*Iterate and Send it back to Client ExtJs Grid */
Collection< Map<string,string>> listResults = new ArrayList< Map<string,string>>();
for(Object result:results){
   BasicDynaBean bean = (BasicDynaBean)result;   
   Map<string,string> eachRow =  new HashMap<string, string="">();
   for(DynaProperty property :rowSetDynaClass.getDynaProperties() ){
    eachRow.put(property.getName().replace(" ", "_"), bean.get(property.getName() )!=null?bean.get(property.getName() ).toString():null);
   }
   listResults.add(eachRow);
  }

Map dataMart = new HashMap();
  dataMart.put("totalCount", totalCount);
  dataMart.put("results", listResults);
  if(columnModelArray==null){
   responseMap.putAll(dataMart);
  }else{
   responseMap.put("colModel",columnModelArray);
   responseMap.put("results",dataMart);
  }
  jObject.put("results", responseMap);
  JSONResponseWriterUtils.writeJSON(jObject,"results", response);
    rs.close();
</string,></string,string></string,string></string,string></string,object></string,>
Now we will move to Ext-Js Pagination Grid
var store =  new Ext.data.JsonStore({
         root: 'results',
         totalProperty: 'totalCount',
         remoteSort: true,
         fields:fields, 
         baseParams:{repId:'tenpId'},
         proxy: proxy //can be a memory proxy
  });
//pass the column model + store as above (if needed add memoryproxy for get the metadata + config (if needed))
ReportGrid =function(colModel,store,config){
var cfg = {
   columns:colModel,
         title:'Report',
         store: store,
         trackMouseOver:false,
         disableSelection:true,
         loadMask: true,
        // height:300,
         autoWidth:true,
         flex:1,
         bbar: new Ext.PagingToolbar({
             pageSize: 10,
             store: store,
             displayInfo: true,
             displayMsg: 'Displaying topics {0} - {1} of {2}',
             emptyMsg: "No topics to display"
         })
        };
 Ext.apply(cfg,config);
ReportGrid.superclass.constructor.call(this,cfg );
}
Ext.extend(ReportGrid, Ext.grid.GridPanel, {

});